Xbox Developer Mode Setup Guide
This comprehensive guide will walk you through setting up Xbox Developer Mode on your Xbox console for emulation and homebrew development.
Preliminary Steps
Important Notes
If you are in the Xbox Update Preview program, ensure that you exit it before switching on Dev Mode. This step helps in preventing the E208 error.
Here's how to exit:
- Open the Xbox Insider App
- Navigate to Xbox Update Preview > Manage > Leave Preview
- Update your console through settings
⚠️ Switching between Dev and Retail Modes deletes your Quick Resume states and any local captures. To save captures, use an external USB drive.
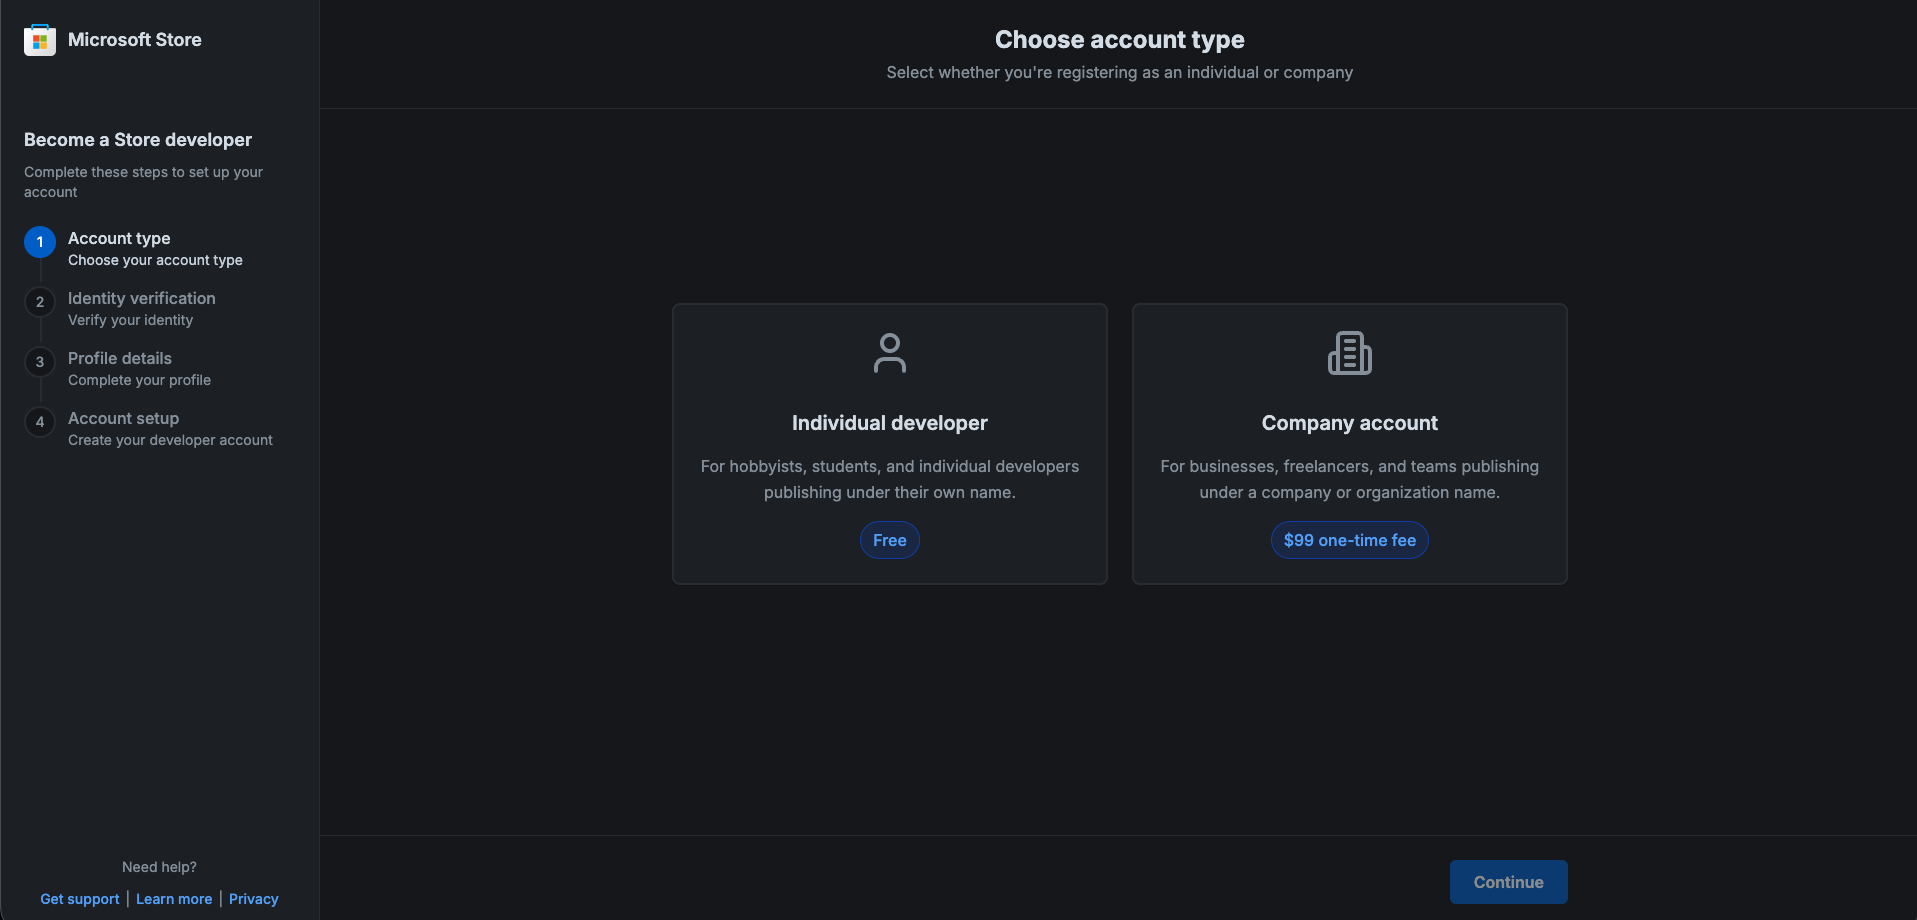
Registering for a Developer Account
Microsoft now uses an onboarding flow for developer accounts individual developer accounts are free, while company accounts require a one-time fee. You still need a Microsoft account (an ordinary account at https://account.microsoft.com/) to sign in to the onboarding flow.
Quick Overview
- Sign in: Go to the onboarding page and sign in with your Microsoft account.
- Choose account type: Select Individual developer (Free) or Company (paid).
- Identity verification: Complete the verification steps (photo ID, phone verification, etc.).
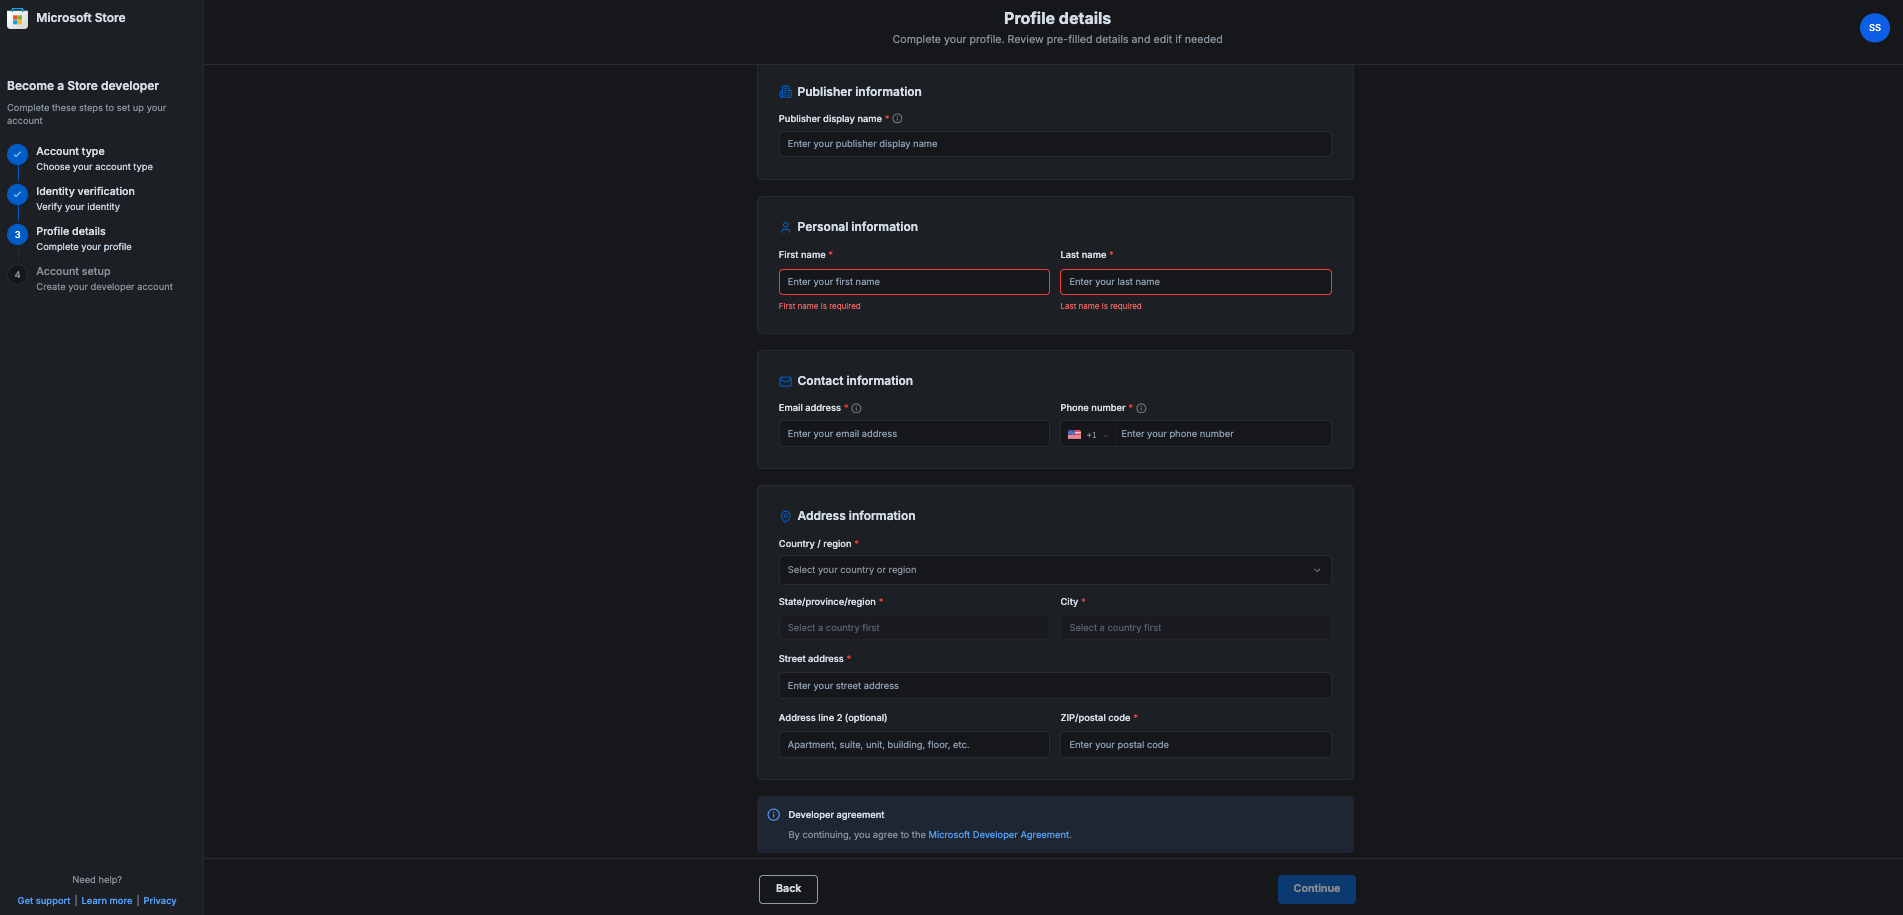
- Profile details: Fill in contact and profile information.
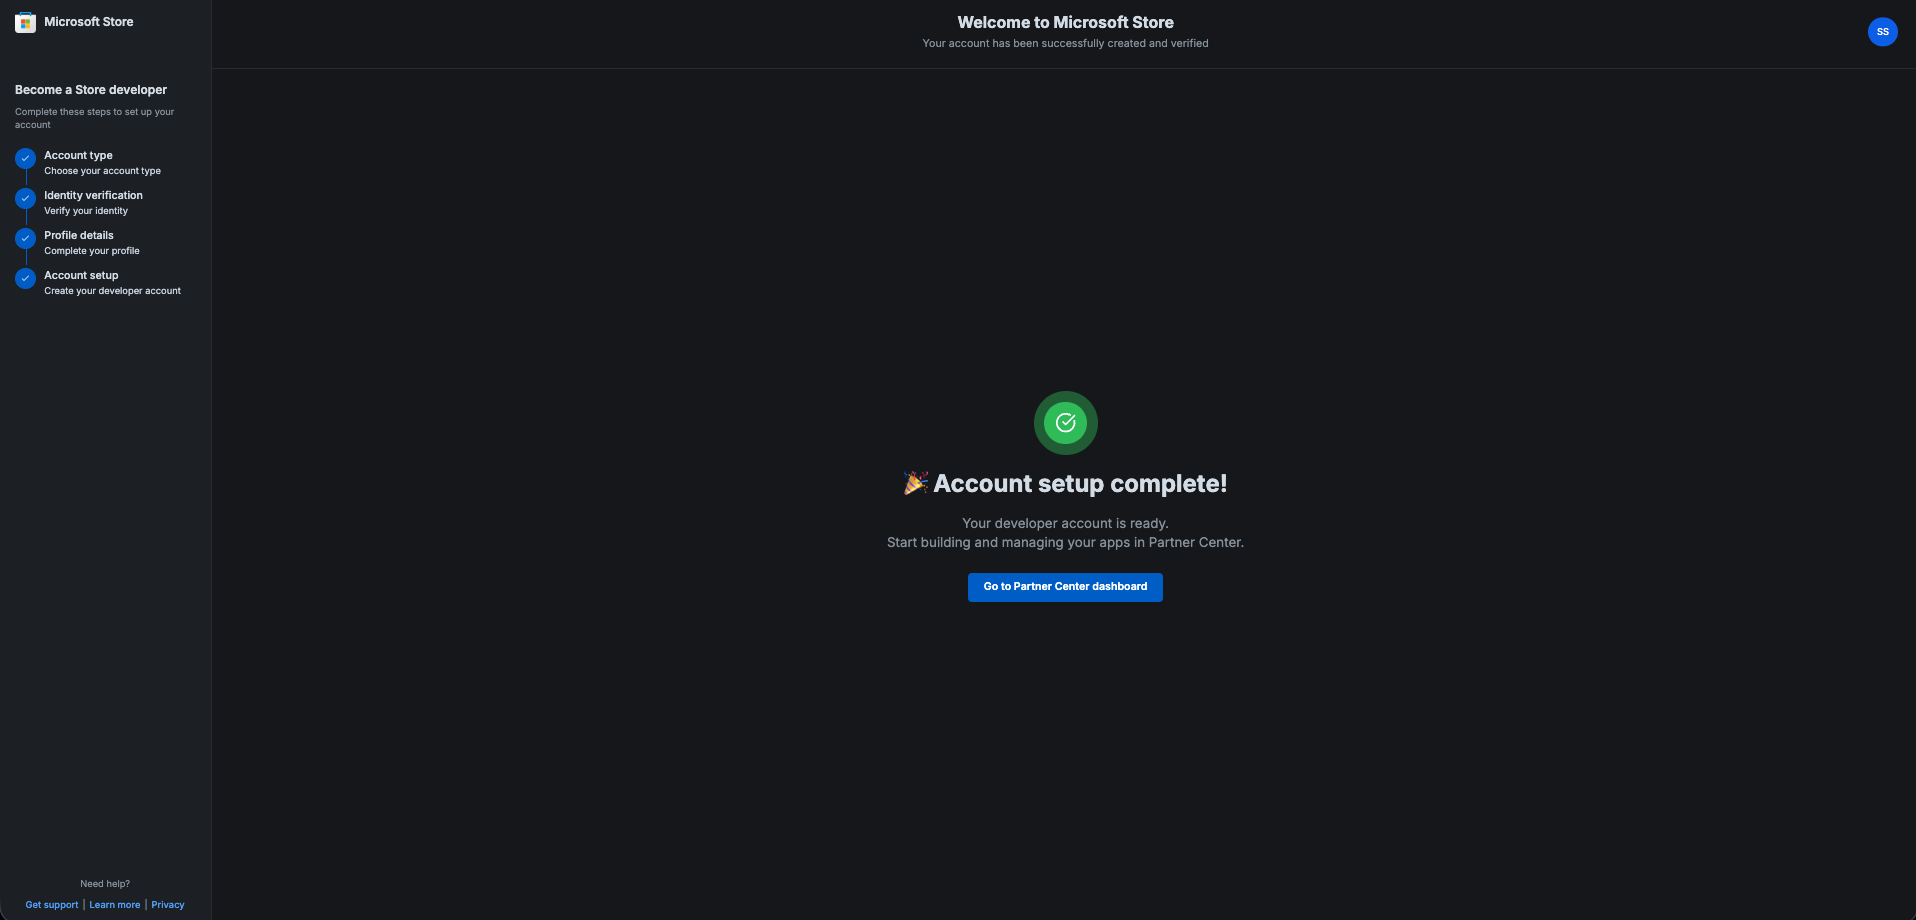
- Account setup: Complete any required payments for company accounts and finalize your developer profile.
Steps
-
Open the onboarding page in your browser: https://storedeveloper.microsoft.com/onboarding
-
Sign in with the Microsoft account you want tied to developer tools (if you don't have one, create it at https://account.microsoft.com/ first).
-
Choose the account type. For most hobbyists and homebrew developers, select Individual developer (it is marked "Free"). If you're registering as a company or publishing under an organization name, select Company this requires a one-time registration fee ($99 USD).
-
Complete identity verification (have your ID and phone ready):
- Take a live photo of your government-issued photo ID and a selfie. Use the original physical document (do not upload a scanned or photocopied image).
- Ensure the ID is not expired and that all text, numbers and the photo are clearly legible.
- Complete phone verification via SMS if prompted.
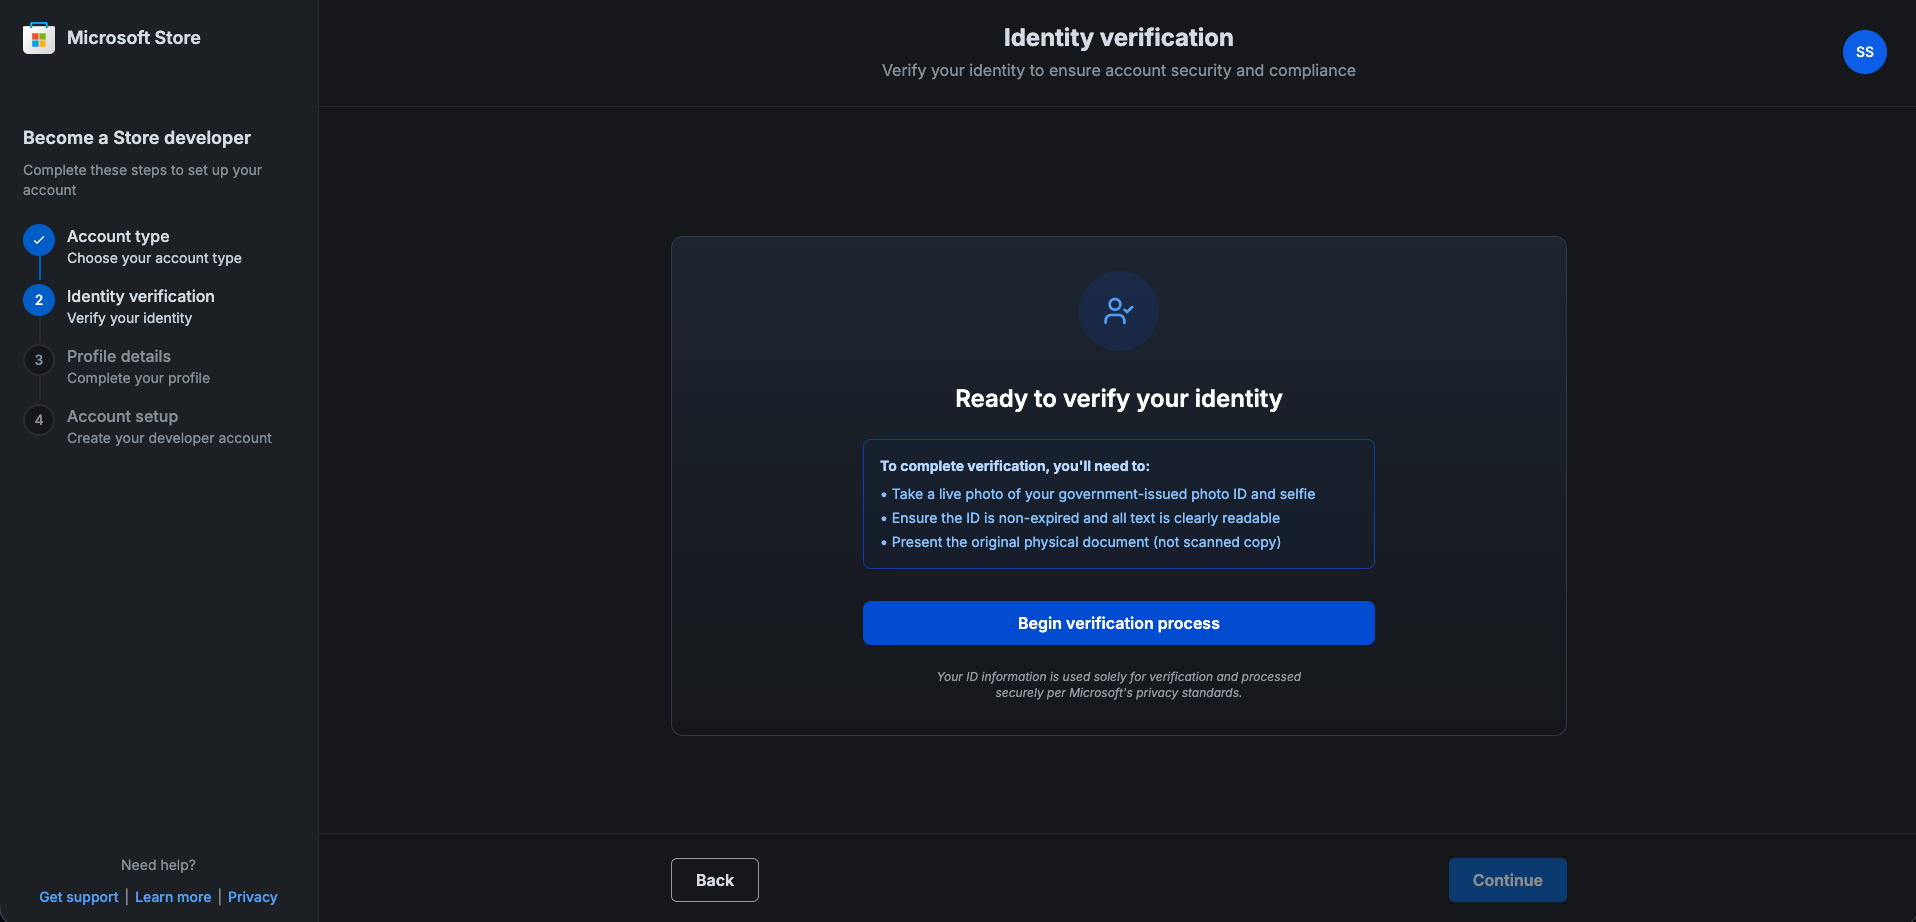
Tip: The verification step will block further progress until completed. Completing the ID photo and phone verification in one session speeds up the process.
-
Fill in your profile details (display name, contact email, country/region). For company accounts you'll also provide company details and pay the one-time registration fee when prompted.
-
Review and submit. After verification and any required payment, your developer account will be created. You should receive confirmation emails and be able to access the Store dashboard.
Notes and troubleshooting
- Individual accounts are free: If you picked the Individual option you will not be charged, but you still must complete identity verification.
- Company accounts require payment: If you pick Company, be ready with a payment method for the one-time fee verification may take longer for organizations.
- If verification fails: Retry with a different ID or contact Microsoft support from the onboarding page.
- Processing time: Account approval may take from a few minutes to several hours depending on verification.
Setting Up USB Drive for Emulation
Manual Instructions for Formatting and Adding Permissions
This is a guaranteed method of successfully preparing your USB drive for emulation. You MUST have access to a Windows PC or virtual machine to perform this setup properly.
Steps:
-
Format your USB drive to NTFS
- Connect your USB/external drive to your PC
- Right-click on your USB and select Format
- Then click File System and select NTFS
- Now select Start at the bottom
-
After formatting, right click on your drive - select Properties and then select the Security tab at the top
- Go to Advanced > Add > Select Principal > Advanced > Find Now > ALL APPLICATION PACKAGES > OK
- Tick the Full Control box > OK
- Tick Replace all child object permission entries box > OK
-
You will get an error about System Volume Information, click continue and ignore it
-
Once you have connected the newly formatted drive to your Xbox, you must set it as Media! (DO NOT SELECT GAMES AND APPS)
Using XboxMediaUSB
XboxMediaUSB is not applying the correct permissions for some users. To resolve this, you will need to do this manually using the instructions above.
Steps:
- Go to the GitHub repository
- Download the latest version of XboxMediaUSB and extract it
- Open XboxMediaUSB.exe
- Select your USB drive and click Format USB
- Safely eject the drive once it's ready
Installing Dev Mode on Xbox
Initial Setup
- Go to the Microsoft Store and search for Xbox Dev Mode
- Install and open the app
- You'll receive a code and a link to enter it
- On your PC, go to the link (https://aka.ms/activatexbox) and enter the code
- Your console will now activate Dev Mode and restart
Configuration
First Setup:
- After a restart, go to Manage Dev Storage and allocate at least 5GB to Dev Mode
- Restart the console to apply these changes
Connect to Internet:
- Go to Settings > Network Settings > Set up wireless network (or use Ethernet)
- Once connected, proceed to configure remote access
Remote Access via PC
Steps:
- Enable Xbox Device Portal: Go to Settings > Remote Access Settings and enable this feature
- If you want to add a layer of security, select the box for Require Authentication and set up a username and password
Accessing Xbox Device Portal
From PC:
- In a web browser, enter the Device Portal link shown on your Xbox
- Ignore the security warning and proceed anyway
What you can do in Device Portal:
- Install emulators
- Manage files
- Change system settings
- And more
Installing Emulators
Download Emulators
- Open Emulation Revival Store
- Open the section that matches what you need:
- Open the app card you want and click Download (or Official Page if the app is hosted externally)
- Extract the downloaded files on your desktop
Upload to Xbox
- In the Device Portal, click the green Add button
- Drag the emulator files (e.g., Dolphin MSIX file) and any required dependency files
- These dependency files will be x64
- Click Next and follow the installation steps
Congratulations! You have successfully set up Xbox Developer Mode on your console. You can now run emulators and homebrew applications.
Remember to always backup your data before switching between modes, and consider using an external USB drive for storing captures and game saves.